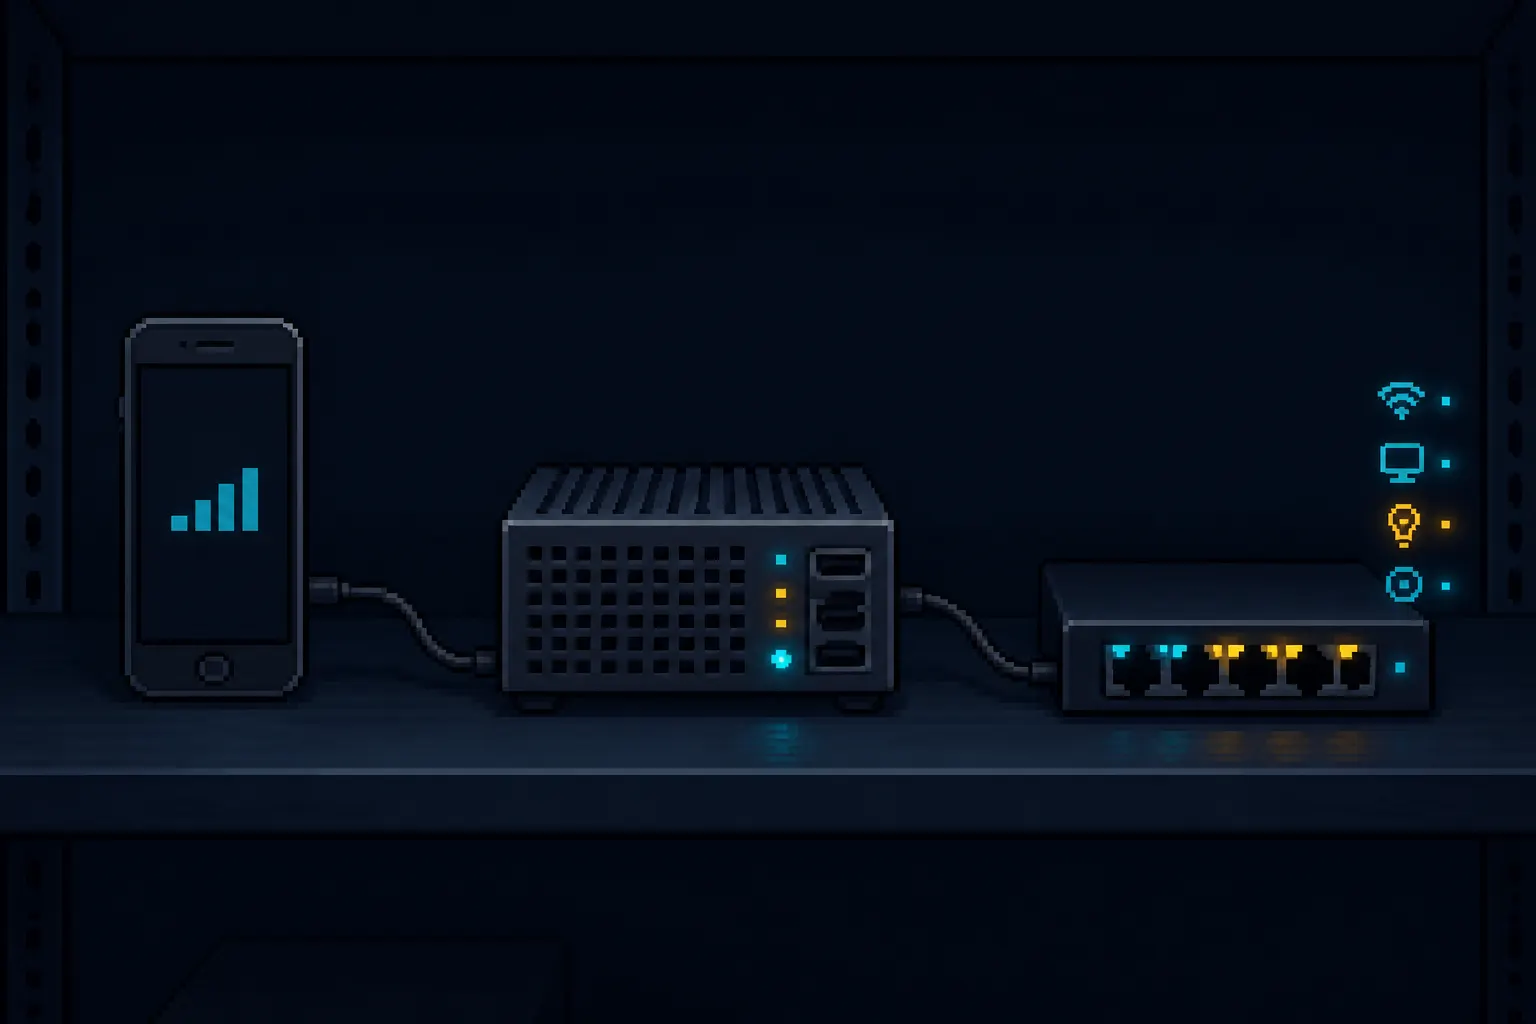
Every now and then, my normal internet connection went down while I was working from home. Tethering one computer solved the immediate problem, but the rest of the house was still offline. The useful version of backup internet had to restore the network, not just my laptop.
My answer was an old iPhone beside the router and a small Ubuntu VM on my Proxmox host. The phone supplied cellular internet over USB, the VM forwarded it to the LAN, and the router used that VM as a temporary gateway. Once the preparation was done, an outage became a short routine: connect the phone, start the VM, enable the backup route, and the network was running again.
An Android phone can fill the same role. The routing, NAT, Netplan, and router configuration do not change once Linux sees the phone as a network interface. Only the phone-specific connection step and required packages differ.
This is still the method that worked for me. A router with proper dual-WAN or USB-modem support is cleaner because it removes the VM from the path, but replacing the router was not the problem I was trying to solve. Nothing here depends strictly on Proxmox; a Raspberry Pi or another small Linux host with a LAN connection could fill the same role. The update below keeps my original arrangement while making the Ubuntu configuration persistent and easier to recover.
This example routes IPv4 traffic for
192.168.0.0/24. Replace VM ID101, LAN interfaceens18, tether interfaceenx82XXXXXXXXXX, addresses, and subnet with the values from your own network.
How the Backup Path Works
The traffic path is:
Home network -> router -> 192.168.0.249 -> Ubuntu VM -> USB tether -> phone cellular connection
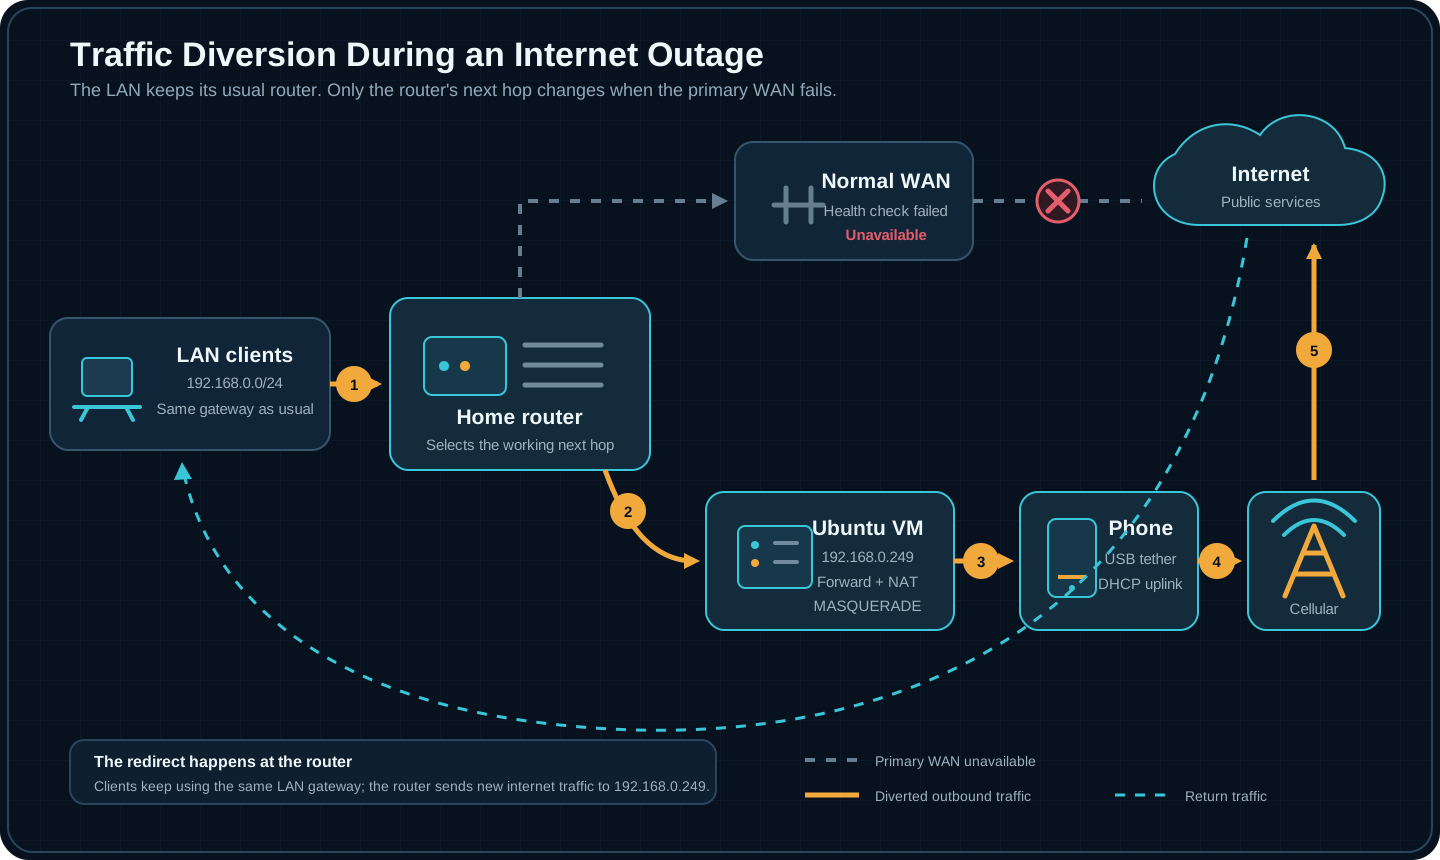
The clients do not need a new gateway during the outage. They continue sending traffic to the router, which changes its next hop from the failed WAN to 192.168.0.249. The Ubuntu VM then forwards and translates that traffic through the tethered phone. Replies return through the same stateful path.
The VM has two network sides:
ens18faces the home LAN and keeps the known address192.168.0.249.enx82XXXXXXXXXXrepresents the interface that appears when Linux detects the tethered phone and receives its configuration through DHCP.
The router-specific part is deliberately small. It only needs either a manually enabled backup default route or a higher-distance route with health checking, pointing to 192.168.0.249.
Prepare the Proxmox VM
I create an Ubuntu VM and give its LAN interface the known address 192.168.0.249. A DHCP reservation on the router is also fine, as long as the address cannot be handed to another client.
On the Proxmox host, I identify the phone and attach it to the VM:
lsusb
qm set 101 --usb0 host=VENDOR_ID:PRODUCT_ID
qm config 101
Proxmox can map a USB device by vendor and product ID or by its physical host port. A fixed port can be convenient for a phone that lives beside the router. It can also help if enabling tethering changes the phone’s USB product ID. The web interface exposes the same choice under the VM’s Hardware > Add > USB Device menu.
USB passthrough ties the VM to hardware on that Proxmox node, so I do not expect to live-migrate this VM while the phone is attached.
Inside Ubuntu, both phone types use the same base networking tools:
sudo apt update
sudo apt install -y usbutils iptables iptables-persistent curl
For an iPhone, I also install its pairing and tethering support:
sudo apt install -y ipheth-utils usbmuxd libimobiledevice-utils
ipheth-utils remains available in current Ubuntu releases. The kernel carries the iPhone network driver, while the package supplies the pairing support and udev rule used when the phone is connected.
Android normally needs no additional userspace package. Linux handles its USB Ethernet mode through kernel drivers such as rndis_host, cdc_ether, or cdc_ncm. Android Debug Bridge is not part of this traffic path, so installing adb does not make tethering work.
Connect the Phone
iPhone
On the iPhone, I open Settings > Personal Hotspot and enable Allow Others to Join. I connect the USB cable and accept Trust This Computer if the phone asks.
Then I confirm that the VM sees both the USB device and the new network interface:
lsusb
journalctl -k -b | grep -i -E 'iphone|ipheth'
ip -br link
idevicepair validate
Android
On Android, I connect the USB cable first, then open Settings > Network & internet > Hotspot & tethering and enable USB tethering. The exact menu names vary between manufacturers.
There is no pairing command. I look for the USB network driver and the newly created interface:
lsusb
lsusb -t
journalctl -k -b | grep -i -E 'rndis|cdc_ether|cdc_ncm|usbnet'
ip -br link
On a normal Ubuntu kernel the correct driver should load automatically. If the phone appears in lsusb but no network interface appears, I check whether the common modules exist before changing packages:
modinfo rndis_host
modinfo cdc_ether
modinfo cdc_ncm
I can try loading the driver reported by the phone or kernel log, for example:
sudo modprobe rndis_host
If none of those modules exists, the VM may be using a reduced kernel installation. On Ubuntu’s generic kernel, I check for and install the matching extra-modules package:
apt-cache show "linux-modules-extra-$(uname -r)"
sudo apt install "linux-modules-extra-$(uname -r)"
I only run the install if apt-cache finds that exact package. Other Ubuntu kernel flavours use their own module packages. This is a kernel packaging problem, not a reason to install adb.
Identify the Tether Interface
The exact interface name varies by phone and driver. It may look like enx82XXXXXXXXXX, usb0, or another predictable network name. I use the name reported by ip -br link rather than copying the placeholder used in this article.
The phone supplies its address, gateway, and DNS information through DHCP. An iPhone often uses 172.20.10.1 as the phone-side gateway, while Android addressing varies. I read the active lease and route instead of assuming either:
networkctl status enx82XXXXXXXXXX
ip route show
Configure Ubuntu with Netplan
My original setup wrote raw systemd-networkd files. That still works, but current Ubuntu uses Netplan as its normal configuration layer. I first inspect the existing configuration so I do not define the same interface twice:
sudo netplan get
ls -l /etc/netplan/
I merge the following settings into the existing Netplan file. The LAN keeps a normal default route with metric 500; the phone route uses metric 50, so it wins only while the tether exists.
network:
  version: 2
  renderer: networkd
  ethernets:
    ens18:
      addresses:
        - 192.168.0.249/24
      routes:
        - to: default
          via: 192.168.0.1
          metric: 500
    enx82XXXXXXXXXX:
      dhcp4: true
      optional: true
      dhcp4-overrides:
        route-metric: 50
I validate it before making it permanent:
sudo netplan generate
sudo netplan try
netplan status
ip route show
netplan try rolls the change back if I lose connectivity and do not confirm it. That is particularly useful when the Proxmox console is not already open.
Enable Forwarding and NAT
The VM now knows how to reach both networks, but Linux still needs to forward traffic and translate LAN addresses to the phone connection:
sudo sysctl -w net.ipv4.ip_forward=1
printf 'net.ipv4.ip_forward = 1\n' | \
  sudo tee /etc/sysctl.d/90-tether-router.conf

sudo iptables -t nat -A POSTROUTING \
  -s 192.168.0.0/24 -o enx82XXXXXXXXXX -j MASQUERADE

sudo iptables -A FORWARD \
  -i ens18 -o enx82XXXXXXXXXX -s 192.168.0.0/24 \
  -m conntrack --ctstate NEW,ESTABLISHED -j ACCEPT

sudo iptables -A FORWARD \
  -i enx82XXXXXXXXXX -o ens18 -d 192.168.0.0/24 \
  -m conntrack --ctstate ESTABLISHED,RELATED -j ACCEPT

sudo netfilter-persistent save
Saving the rules is the small improvement that makes this genuinely preemptive. netfilter-persistent restores them at boot, so I am not searching my shell history while the main connection is already down.
These rules are intentionally limited to the LAN subnet and the two relevant interfaces. A broad FORWARD or INPUT accept rule can make a quick demonstration work, but it is unnecessary here. For a more tightly managed setup, I would also isolate this routing VM, restrict its management access, and express the same policy in the firewall system already used on that host.
Configure the Router
The exact command depends on the router. Conceptually, I add this route:
backup default route via 192.168.0.249 with a higher distance than the normal WAN
For a manual setup I leave that route disabled until it is needed. If the router supports gateway health checks, it can switch automatically, but the check must test internet reachability rather than merely pinging the Ubuntu VM. The VM can remain reachable even when the phone is disconnected.
Test It Before the Outage
I do not consider the backup ready until I have disconnected or disabled the normal WAN and completed a full test from another LAN device.
On the VM:
ping -c 2 192.168.0.1
ip route get 1.1.1.1
curl --interface enx82XXXXXXXXXX --max-time 10 https://example.com/
sudo iptables -nvL FORWARD
sudo iptables -t nat -nvL POSTROUTING
Then I enable the router’s backup route and open a website from a separate computer or phone connected to the home network. That final client test proves the whole path, not only the VM’s own cellular connection.
The Raw networkd Version I Used
For historical context, the lower-level configuration behind the Netplan example looks like this:
# /etc/systemd/network/10-lan.network
[Match]
Name=ens18

[Network]
Address=192.168.0.249/24

[Route]
Gateway=192.168.0.1
Metric=500

# /etc/systemd/network/30-tethering.network
[Match]
Name=enx82XXXXXXXXXX

[Network]
DHCP=ipv4

[DHCPv4]
RouteMetric=50
This raw method worked for me and remains useful on systems managed directly by systemd-networkd. On Ubuntu I now prefer Netplan because it is the distribution’s supported configuration surface and can safely test changes with netplan try.
During an Outage
With everything prepared, the recovery sequence is short:
- Connect the phone and enable Personal Hotspot or USB tethering.
- Start the Ubuntu VM if it is not already running.
- Confirm that the tether interface has an address and default route.
- Enable the backup gateway on the router.
- Test from a normal device on the home network.
That is the part I wanted to preserve from the original setup. The implementation can be made more automatic, but the useful result is simple: when the normal internet fails, the old phone can bring the whole network back instead of rescuing only one computer.
Rollback
I disable the router’s backup route first. If the VM no longer has any routing job, I can remove only the rules added above and turn forwarding off:
sudo iptables -t nat -D POSTROUTING \
  -s 192.168.0.0/24 -o enx82XXXXXXXXXX -j MASQUERADE

sudo iptables -D FORWARD \
  -i ens18 -o enx82XXXXXXXXXX -s 192.168.0.0/24 \
  -m conntrack --ctstate NEW,ESTABLISHED -j ACCEPT

sudo iptables -D FORWARD \
  -i enx82XXXXXXXXXX -o ens18 -d 192.168.0.0/24 \
  -m conntrack --ctstate ESTABLISHED,RELATED -j ACCEPT

sudo sysctl -w net.ipv4.ip_forward=0
sudo rm /etc/sysctl.d/90-tether-router.conf
sudo netfilter-persistent save
Documentation
- Apple: Share your internet connection from your iPhone
- Android Help: Share a mobile connection by USB tethering
- Linux kernel: USB gadget networking and RNDIS
- Ubuntu package files:
rndis_hostin the generic kernel’s extra modules - Proxmox VE Administration Guide: QEMU/KVM virtual machines and USB passthrough
- Ubuntu Server: Configuring networks with Netplan
- Netplan YAML reference
- Netplan: Safely test a configuration
- Ubuntu package:
ipheth-utils - Ubuntu manual:
netfilter-persistent
Buy Me a Coffee