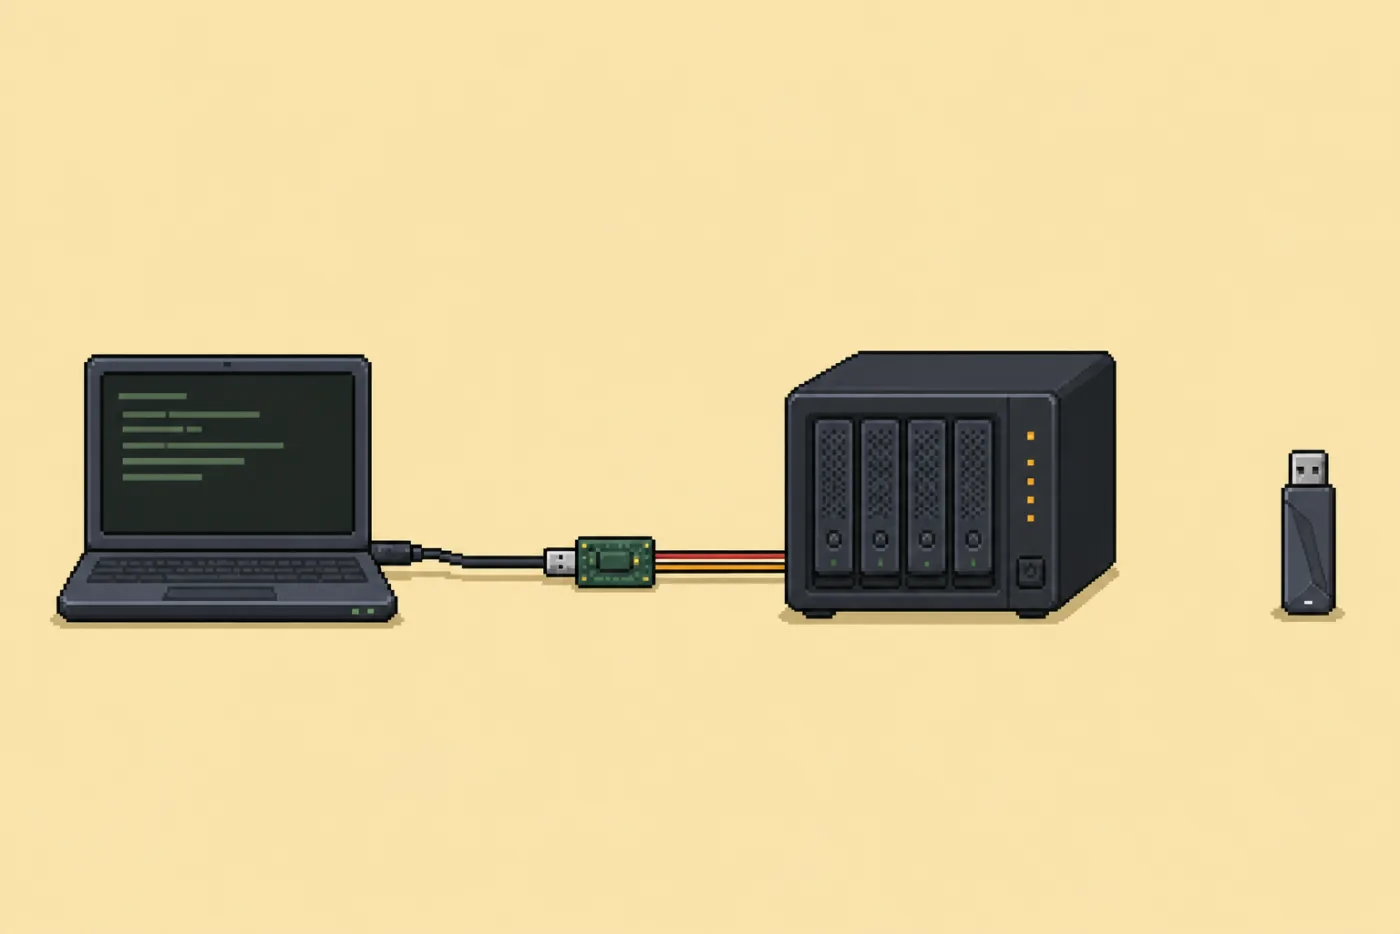
The ReadyNAS Ultra 4 Plus has four drive bays, two network ports, a small status display and no ordinary monitor output. For years that was part of its charm. It was an appliance. Press the button, listen for the disks, and trust the little screen on the front.
Then I started thinking about installing a modern Linux system on it.
Suddenly the missing display was not charming at all. A normal PC can show a boot menu, an installer and the exact line where startup failed. The ReadyNAS could show me a few characters on its front panel. Somewhere behind the case, however, was the machine’s real voice: a serial console.
This article records the path I researched on 22 November 2025. It is a field guide and a prequel to my later ReadyNAS replacement story, not a victory report. I did not complete this Debian installation on the Ultra 4 Plus, so every hardware-specific step below ends in a checkpoint. Where the evidence came from another ReadyNAS owner rather than my own bench, I say so.
Why the box was still worth the trouble
NETGEAR’s 2011 hardware manual describes the Ultra 4 Plus as a four-bay machine with a dual-core Intel processor, 1 GB DDR2 SODIMM memory, two gigabit Ethernet ports and three USB 2.0 ports. Mine had already been upgraded to 4 GB of RAM. The official dimensions and front-panel controls are in the ReadyNAS Ultra and Ultra Plus hardware manual.
That is modest hardware now, but still enough for a small Debian file server, backup target or laboratory machine. The real attraction was not performance. It was the possibility of separating useful hardware from firmware whose era had passed.
The danger was equally simple: an installation mistake could erase the internal boot device or the data disks. A copied forum command cannot identify my disks for me.
The three consoles in one boot
A headless installation is easier to reason about when it is split into three hand-offs:
- The ReadyNAS firmware starts and chooses a boot device.
- The installer bootloader starts Linux and gives the kernel a serial console.
- The installed bootloader starts the permanent system and provides a serial login.
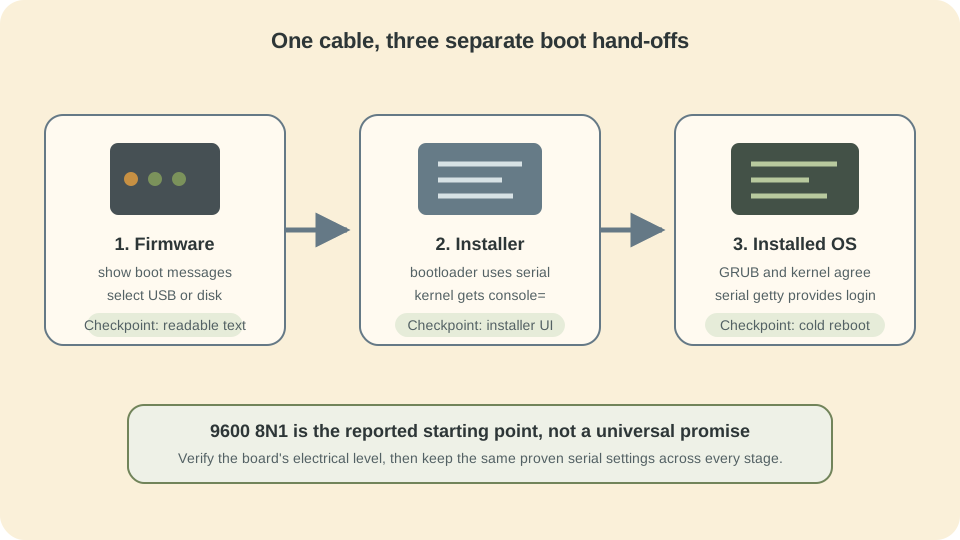
Seeing firmware text does not prove the Debian installer will use serial. Seeing the installer does not prove the installed GRUB configuration will. I planned to prove each stage before changing the next one.
Checkpoint zero: preserve a way home
The original chat that prompted this guide wanted to skip backing up the old bootloader. I would not make that choice in a public procedure. The internal flash layout, disk order and boot behavior were not yet verified on my unit.
Before opening the case or writing an installer:
- copy all irreplaceable data to another system;
- export any configuration that might still be useful;
- photograph disk order, labels and cable positions;
- record the current boot messages once serial works;
- keep the original data disks out of the first installation test;
- use a spare disk as the first Debian target.
The safest first milestone is read-only: obtain a serial console and watch the stock system boot. Nothing needs to be erased for that.
Finding the serial console without guessing voltage
Owners of similar Ultra-era ReadyNAS units report a four-pin logic-level serial header behind a rear sticker. Reports commonly describe VCC, TX, RX and ground, with 9600 baud, 8 data bits, no parity and 1 stop bit. NETGEAR’s public hardware manual does not document that header or its electrical levels, and I did not verify the pin order on my board.
That distinction matters. A USB-to-TTL adapter is not the same as a PC RS-232 port. RS-232 voltage levels can damage logic-level electronics. Even among USB-to-TTL adapters, a jumper marked 3.3 V may control only the power pin rather than the signal voltage.
My safe wiring plan was:
- power the NAS off before attaching leads;
- identify the exact board revision;
- verify ground and signal voltage with appropriate test equipment or a trusted board-specific source;
- leave the header’s VCC pin disconnected; The adapter is here to exchange logic signals, not to power the NAS. Leaving VCC disconnected keeps it out of the NAS power path; shared ground and crossed TX/RX are enough for communication.
- connect ground to ground;
- cross NAS TX to adapter RX and NAS RX to adapter TX;
- add a level shifter if the logic levels are uncertain.
No output is a reason to stop and inspect, not to start connecting the remaining pin.
On a Linux laptop, I would identify the adapter with:
ls -l /dev/serial/by-id/
dmesg | tail -n 30
Then open the stable /dev/serial/by-id/... path at the reported starting point of
. With picocom that looks like:
sudo picocom \
  --baud 9600 --flow n --parity n --databits 8 --stopbits 1 \
  /dev/serial/by-id/usb-YOUR_ADAPTER
Those single-letter flow and parity values come from picocom’s own manual.
The checkpoint is a complete stock boot transcript with readable characters. Garbage usually means a baud or framing mismatch. Silence can mean TX and RX are reversed, the adapter path is wrong, the header is different, or the console is not enabled. I would not move on until a cold boot was consistently visible.
Preparing Debian for a serial-only machine
Debian 13’s amd64 installer is the natural current starting point for this x86 machine. Debian publishes USB-capable installation images and explains how to verify and write them in the Debian installation guide.
Writing an image destroys the selected USB device. Identify it before and after inserting the stick:
lsblk -d -o NAME,PATH,SIZE,MODEL,SERIAL,TRAN
Only after checking the model, size and transport would I write the verified image. /dev/sdX below is deliberately invalid and must be replaced with the whole USB device, never a partition and never one of the NAS disks:
sudo dd \
  if=debian-13-amd64-netinst.iso \
  of=/dev/sdX \
  bs=4M status=progress conv=fsync
The installer kernel needs a console parameter such as:
console=ttyS0,9600n8
Debian’s official serial-console instructions say to put the parameter after --- so supported installers can copy it into the installed bootloader configuration. They also note that 57600 and 115200 are common alternatives, but both ends must agree. See Debian’s boot-parameter documentation.
There is one catch: the bootloader menu itself must be visible before I can type that parameter. Historical ReadyNAS guides modify an ISOLINUX or SYSLINUX configuration with serial output directives. Current Debian images may contain several boot paths, so I would inspect the exact downloaded image rather than paste a decade-old remastering command and hope it edits the path this BIOS actually uses.
The checkpoint is not merely a blinking USB LED. It is a readable Debian installer over the same serial cable.
Reaching the firmware boot menu
NETGEAR still documents the Ultra 4 Plus boot-menu sequence:
- Power the unit off.
- Hold the recessed Reset button with a paper clip.
- Press Power.
- Keep holding Reset until the status display announces the boot menu.
- Use the Backup button to move through the available modes.
- Press and release Reset to select the displayed mode.
Those steps are from NETGEAR’s Ultra 4 Plus boot-menu article. Community guides also describe holding the front Backup button while powering on to force a prepared USB stick. That shortcut is not the sequence NETGEAR documents, so I would treat it as board and firmware specific.
Serial makes this experiment recoverable. I can see which boot device the firmware tries, whether the USB bootloader starts and exactly where control stops.
Install to a spare disk first
The earlier plan put /boot on a tiny internal flash device and root on an mdraid across all four bays. That is too many destructive assumptions for the first attempt.
My revised sequence is smaller:
- Remove and label the original data disks.
- Insert one expendable spare disk.
- Boot the serial-enabled installer.
- Confirm disk identity by model, serial number and capacity.
- Install a minimal Debian system to the spare disk.
- Install SSH, but keep serial as the recovery console.
- Reboot several times before considering internal flash or RAID.
This proves the kernel, storage controller, network interfaces, fan behavior and reboot path without risking the original array. Only after that would I decide whether the internal flash is useful, replaceable or best left untouched.
Make the installed system speak serial
Once Debian boots from the spare disk, GRUB and the kernel both need the same verified serial settings. A typical /etc/default/grub starting point is:
GRUB_TIMEOUT=5
GRUB_TERMINAL="serial"
GRUB_SERIAL_COMMAND="serial --unit=0 --speed=9600 --word=8 --parity=no --stop=1"
GRUB_CMDLINE_LINUX="console=tty0 console=ttyS0,9600n8"
Then rebuild the configuration and enable a login prompt:
sudo update-grub
sudo systemctl enable serial-getty@ttyS0.service
Before rebooting, I would keep the installer USB available as rescue media and verify that SSH works from another machine. After reboot, the expected chain is visible in one terminal: firmware, GRUB, kernel messages and a Debian login prompt.
The final checkpoint is an unattended cold boot. A NAS that requires a paper clip or a laptop after every power failure is still an experiment.
Where this guide honestly ends
I researched a plausible path from a hidden serial header to a maintainable Debian boot. I did not prove the ReadyNAS header pinout, modify its internal flash, complete the Debian installation or run that configuration in production. The exact serial electrical level and USB boot behavior still require verification on the actual board.
That unresolved boundary is useful. It keeps this article from becoming one of those hardware guides where confidence quietly replaces evidence. The later story of replacing the ReadyNAS with newer hardware is a migration story. This one is about the earlier moment when I asked whether the old box could be taught to speak for itself.
The ReadyNAS did not need a glossy dashboard for this experiment. It needed one verified wire at a time, a terminal listening at the right speed, and the discipline to stop whenever the story ran ahead of the hardware.
Buy Me a Coffee