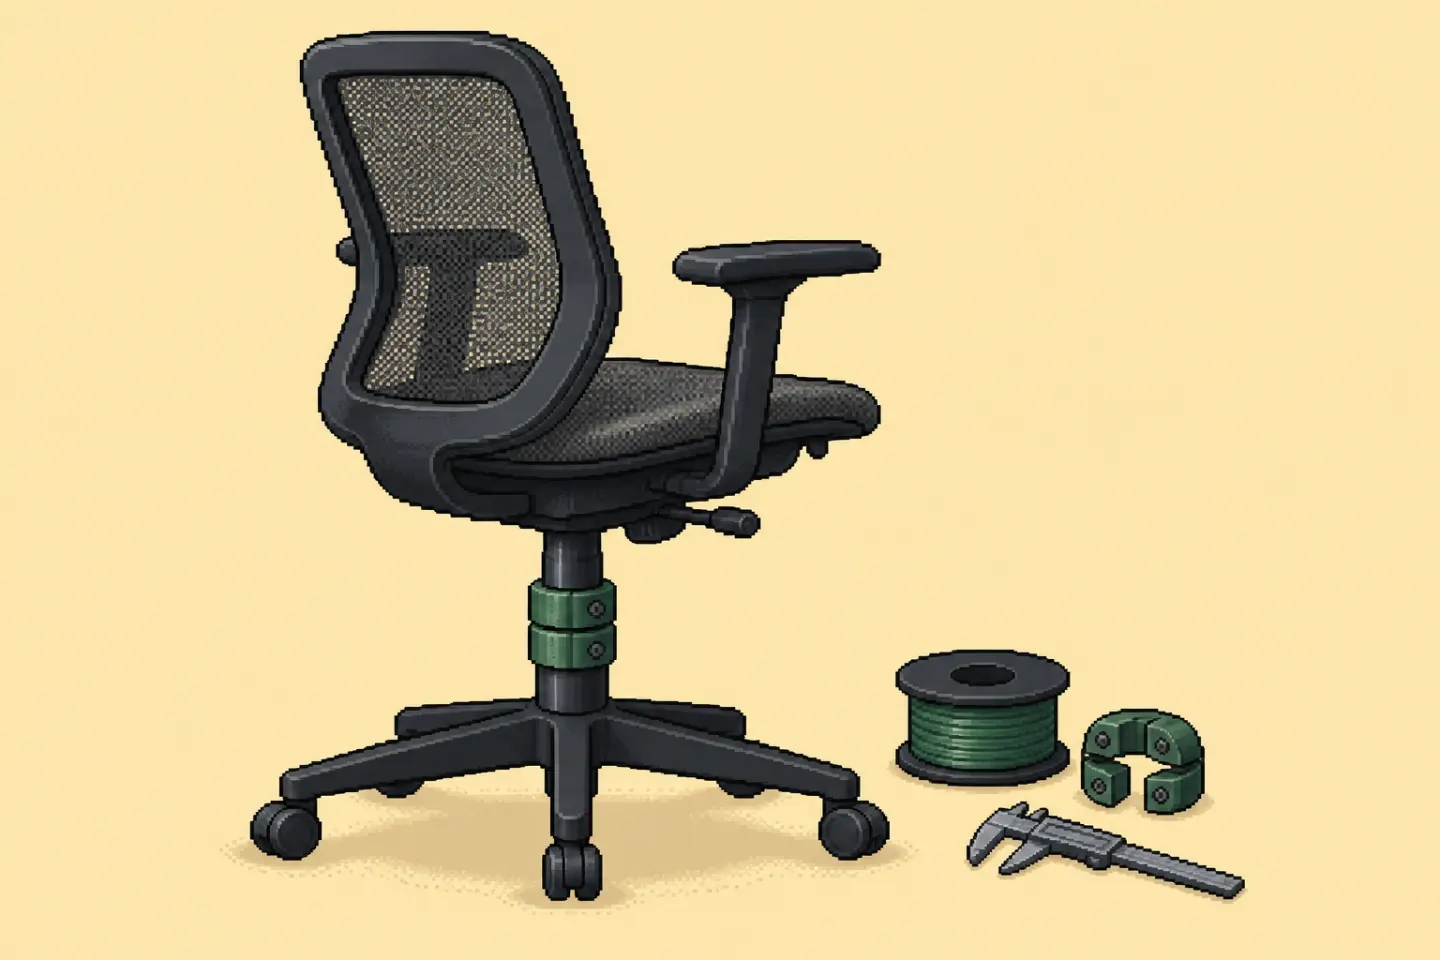
The chair was not broken in the dramatic sense. It still rose, lowered and carried me through a working day. It simply moved when it should have felt planted.
That small wobble became impossible to ignore. Every shift of my weight travelled through the seat and ended in a faint knock inside the cylinder assembly. Once I had noticed it, I could feel it before I had even settled into the chair.
The obvious answer was a replacement gas cylinder. It was also the answer I did not want to buy that day. The rest of the chair was good, and the movement looked like a mechanical problem I could at least understand. I decided to make a bridge to the proper repair, not pretend that I could improve a pressurised gas spring with a clever piece of plastic.
Finding the movement
I first had to stop calling the whole thing “the cylinder”. There were several surfaces involved: the shiny moving section, the outer body and the thicker black section below it. The play was inside that stack. A clamp around the wrong surface could bind the height adjustment, damage the finish or put force into a pressurised component that was never meant to be squeezed.
That made the design brief quite narrow:
- stabilise the black cylinder from outside;
- put most of the clamping force into the larger outer body;
- let the printed part yield before the chair did;
- use screws to tune the preload instead of relying on a press fit;
- keep the gas lift free to do its normal job.
The clamp would be a guide and a brace, not a repair to the gas spring itself.
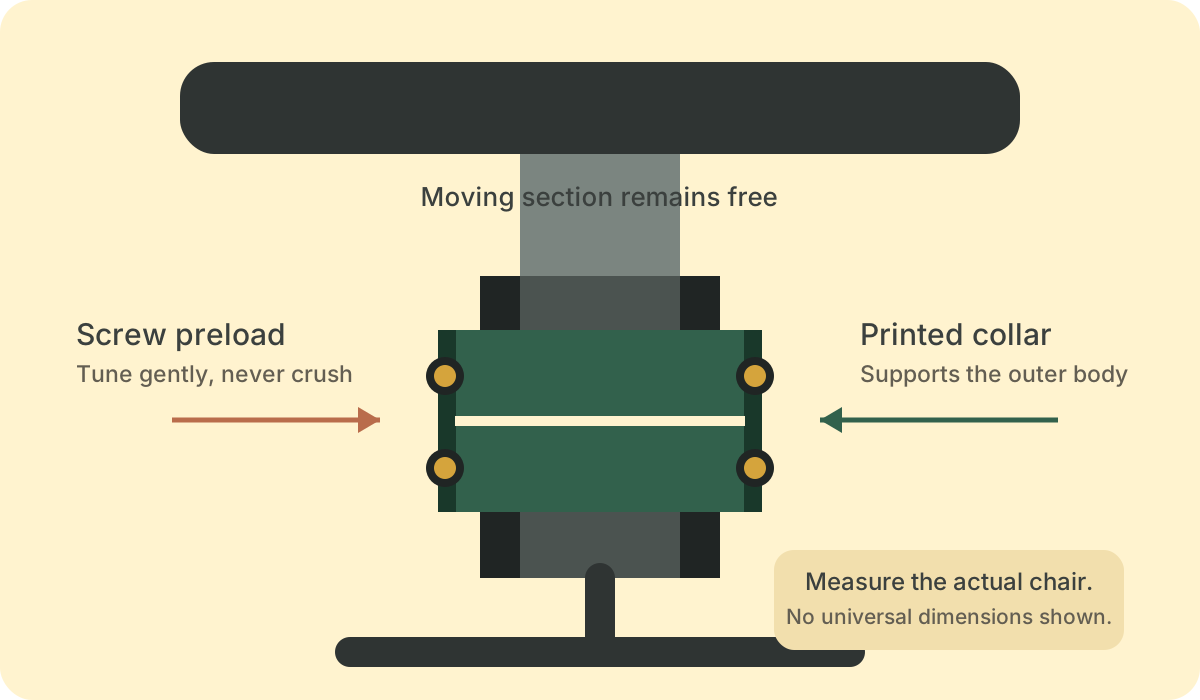
The diagram shows the load path, not a dimensioned Aeron drawing. Every worn cylinder needs to be measured on the actual chair.
Modelling the chair before the fix
I opened Onshape and modelled the assembly as reference bodies: the inner cylinder, the outer cylinder and the thick black section. I did not need the entire five-star base. I needed enough geometry to answer a smaller question: where could a printed part sit without interfering with movement?
With the reference bodies in place, I built the clamp around them. It became a split part that could be installed without dismantling the chair. Real screws pulled the halves together. The outside wrapped the larger body, while the inside transferred just enough pressure to steady the black cylinder.
I deliberately avoided an exact recipe of copied dimensions here. Calipers, printer tolerances and wear all matter. A bore that is gentle on my chair could be a friction lock on another. I left clearance, treated the screw tension as adjustment, and aimed for “no distracting play” rather than “as tight as possible”.
Three hours of waiting
The PETG print took three hours.
That is an odd amount of time in a repair. Long enough to wonder whether the idea is sensible, but short enough to keep walking past the printer and watching another layer turn an argument in CAD into a physical object.
When it finished, I fitted both halves around the assembly and brought the screws in gradually. I checked the clamp after each small adjustment. It needed to sit square. The chair still needed to move through its height range without dragging. The printed ears could not show whitening or cracks.
Then I sat down.
The chair felt like a chair again.
The clamp did not rebuild the worn surfaces inside the cylinder. It simply stopped their play from dominating the feel of the entire seat. The main force stayed around the outer body and indirectly steadied the black section, with PETG providing a little mechanical mercy if something needed to give.
A useful temporary repair
This is not the factory-correct fix. Herman Miller publishes replacement procedures for pneumatic cylinders and warns that their contents are under extreme pressure. The official route is still to replace a worn cylinder with the correct part. Herman Miller pneumatic-cylinder service instructions
I will replace mine another day. Until then, the printed clamp has bought me something more useful than perfection: time without the irritation.
If I make another version, I will keep the same safety boundaries:
- never drill, puncture, heat or open a gas cylinder;
- never hammer a printed collar onto the moving section;
- remove the clamp if height adjustment binds or the chair no longer sits square;
- inspect PETG around the screw ears for cracks, creep and whitening;
- treat any sudden change in the gas lift as a reason to stop using the chair.
The result is modest. A measured shape, a few screws and three hours of layers gave a good old chair some composure back.
Buy Me a Coffee